Showing posts with label cancer. Show all posts

Dr Josh Axe


7 Benefits of Feta Cheese Nutrition — the Healthiest Cheese & Even Anti-Cancer

Feta cheese nutrition - Dr. Axe
I have good news! Not all cheese is bad for you — so if you’re a cheese lover, make sure you choose the healthiest cheese out there: feta.
Cheese is a delicious, savory addition to many dishes, but with the rise in popularity of processed dairy, it’s become a product many people avoid when sticking to a healthy diet.
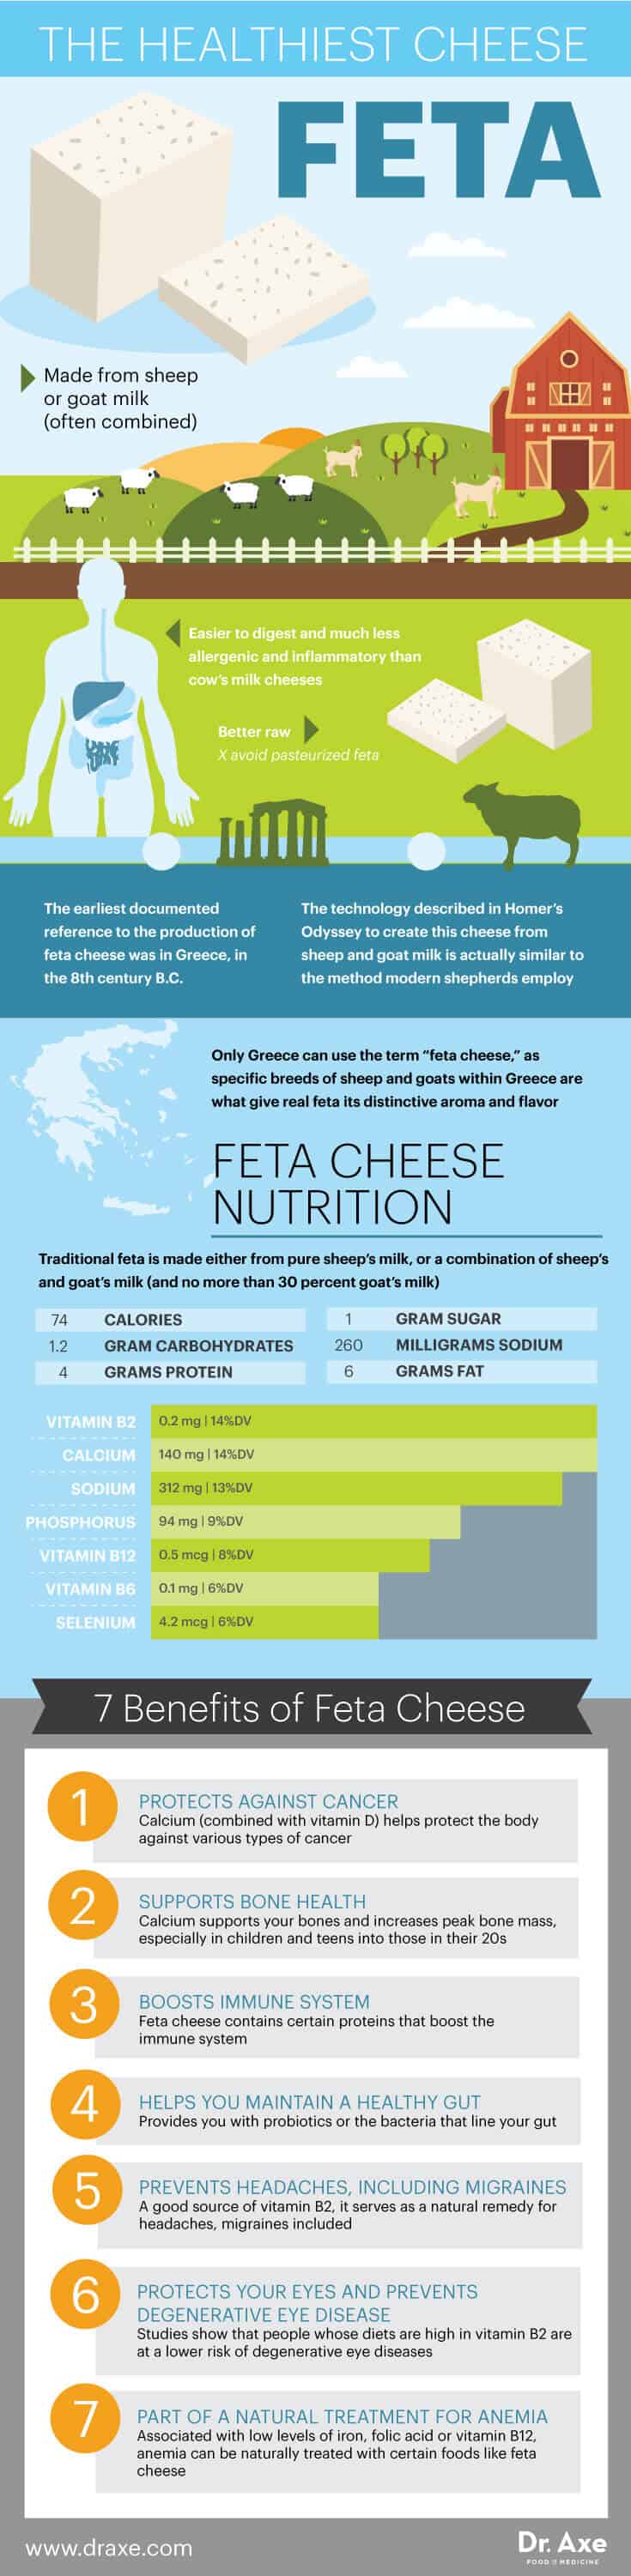
Made from sheep or goat milk (often combined), feta cheese is a nutrient-rich option for getting the flavor you’re looking for, without the guilt. Feta is easier to digest and much less allergenic and inflammatory than cheeses from cow’s milk, which is encouraging to those of you who may be sensitive to dairy products.

Like most food products, it’s much better raw. If you can, avoid feta cheese made from pasteurized milk products. It’s important to also remember that feta cheese, high in sodium and saturated fat, should be used sparingly, and not every day.

Feta Cheese Nutrition Facts

The word “feta,” used by Greeks to describe this extremely popular cheese, comes from the Italian word fetta, which means “slice.” While the European Union now has specific qualifications of feta cheese, it’s possible to find “feta” cheese in other parts of the world that is made from cow or buffalo milk.
Need a reason to eat more (healthy!) cheese. Click here for a free guide on the 7 benefits of feta cheese!

Feta is a soft brined cheese characterized by few to no holes, a tangy taste and no skin. Feta cheese nutrition will depend on exactly what brand and type of feta you get. Traditional feta is made either from pure sheep’s milk, or a combination of sheep’s and goat’s milk (and no more than 30 percent goat’s milk).
One serving of feta cheese (weighing about 28 grams) contains: (1)
  • 74 calories
  • 6 grams of fat
  • 260 milligrams sodium 
  • 1.2 grams carbohydrates
  • 4 grams protein
  • 1 gram sugar
  • 0.2 milligrams riboflavin/vitamin B2 (14 percent DV)
  • 140 milligrams calcium (14 percent DV)
  • 312 milligrams sodium (13 percent DV)
  • 94 milligrams phosphorus (9 percent DV)
  • 0.5 micrograms vitamin B12 (8 percent DV)
  • 0.1 milligrams vitamin B6 (6 percent DV)
  • 4.2 micrograms selenium (6 percent DV)

7 Benefits of Feta Cheese

1. Protects against cancer
Perhaps one of the most intriguing benefits of feta cheese nutrition? It’s cancer-protective effects. As a rich source of calcium, feta cheese allows you to take advantage of research suggesting that calcium (combined with vitamin D) helps protect the body against various types of cancer. (2)
Don’t forget that magnesium is vital for calcium absorption. If you have a magnesium deficiency, your body is not properly absorbing the calcium you consume, which means you won’t get its full health benefits.
But it’s not just calcium in feta cheese nutrition that protects against cancer! The protein alpha-lactalbumin can be found in this Greek cheese as well, and when it binds to calcium and zinc ions, has been suggested to have antibacterial and antitumor properties.
2. Supports bone health
You probably already know that calcium is good for your bones. After all, who hasn’t heard of the “Got Milk” campaign of the ’90s? However, countries with high dairy consumption also have high incidence rates of osteoporosis — so what’s going on, and why might feta be one of the answers to the calcium and dairy question?
First of all, it’s true — calcium supports your bones. It increases peak bone mass, especially in children and teens into those in their 20s. The greater your peak bone mass, the less risk you are at for osteoporosis and other conditions involving the loss of bone mass.
However, milk can hurt your bones, as pasteurized cow’s milk is one of the worst places to get the most calcium, due to its habit of causing acidosis (a high level of acid in the body). Instead, find other high-calcium foods (like feta), and try introducing more alkaline foods into your diet, such as parsley, spinach, and zucchini.
3. Boosts immune system
Another protein found in feta cheese nutrition is called histidine. This protein was initially considered important only in infant health, but later was found essential in adults as well. (3)
When histidine is combined with vitamin B6 (also found in feta cheese), it undergoes a molecular process to become histamine. That compound is part of the inflammatory process. Although it is generally important to remove foods that cause inflammation from your diet, a small degree of inflammation is what allows your immune system to fight disease.
Eating foods like feta cheese sparingly, combined with a diet high in antioxidants to protect from the damage of excess inflammation, can ensure a healthy immune system ready to fight disease the way it was originally designed. (Plus, as a bonus, feta cheese contains probiotics, which also help your immune system fight infection and disease!)
Feta cheese guide - Dr. Axe

4. Helps you maintain a healthy gut
Another good thing about feta cheese nutrition is that is provides you with helpful probiotics! (4) Probiotics are the bacteria that line your gut. When they go out of whack, your body becomes a breeding ground for bacteria, yeast, fungi, parasites and many other very unsavory things.
Not only are probiotics immunity boosters, they allow you to maintain a healthy gut and avoid many digestive problems common in high-stress lifestyles, especially in people who regularly consume GMOs, sugary foods and are exposed to antibiotics and other dangerous chemicals.
5. Prevents headaches, including migraines
Feta cheese is a good source of vitamin B2 or “Riboflavin.” Vitamin B2 has been known for a long time as a natural remedy for headaches, migraines included. (5) A diet rich in vitamin B2 (and Riboflavin supplements, if needed) can serve as a preventative method to limit migraines and other types of chronic headache.
6. Protects your eyes and prevents degenerative eye disease
Riboflavin is good for more than one part of your noggin! Studies show that people whose diets are high in vitamin B2 are at a lower risk of degenerative eye diseases such as cataracts, keratoconus and glaucoma (all of which are associated with aging). (6)
7. Part of a natural treatment for anemia
Anemia is related to a problem with the hemoglobin cell that carries oxygen throughout the body. When your body is unable to get enough oxygen to the cells and tissues, it becomes weak and fatigued.
Associated with low levels of iron, folic acid or vitamin B12, anemia can be naturally treated with certain foods and supplementation of the deficient nutrients. Therefore, the vitamin B12 (and small amount of iron) found in feta cheese can serve as part of a diet to fight anemia. (7)

The History and Battles of Feta Cheese

The earliest documented reference to the production of feta cheese was in Greece, in the 8th century B.C. The technology described in Homer’s Odysseyto create this cheese from sheep and goat milk is actually similar to the method modern shepherds employ. Popular in ancient Greece, feta cheese was vital to Greek gastronomy.
However, what we consider feta cheese today was first recorded in the Byzantine Empire under the name “prósphatos,” meaning “fresh.” It’s brine storage and marketing was later explained by an Italian visitor to the island of Crete.
Feta cheese, interestingly, has been a source of quite a bit of legal battling in recent decades. Within the European Union, Denmark had, at one point, created what they termed “feta cheese,” but made from blanched cow’s milk. Since 2002, marking the resolution of that case, the EU has deemed the term “feta” as a PPO, or “protected product of origin,” of Greece.
Another recent agreement in 2013 between the EU and Canada protects the name “feta cheese” from being used, except when referring to sheep’s/goat’s milk cheese imported from Greece. Canadian manufacturers are now required to label their similar product as “feta-style cheese.”
These disputes originated mainly from the argument that the specific breeds of sheep and goats within Greece are what give real feta its distinctive aroma and flavor.

How to Use + Recipes

Feta is generally used as a topping for salads and other types of food. You can use feta cheese raw or cooked. Many recipes call for feta cheese crumbles, but you’ll also find many recipes that use slices of feta.
One of our best recipes involving feta is my Roasted Beet Salad. It’s a simple salad with antioxidant-rich beets, using feta cheese as a topping.
You may also enjoy feta in many Mediterranean Diet Recipes, including Cucumber Rollups. Just put some raw feta crumbles on sliced cucumber covered in hummus, along with red peppers.
Hungry for grilled cheese? Then I suggest using feta as part of this Avocado Grilled Cheese sandwich. Trust me, you will be really happy you did.

Potential Side Effects & Caution

While feta cheese is significantly less allergenic than cheese derived from cow’s milk, it is still possible to be allergic to goat or sheep’s milk. About 90 percent of people with a diagnosed cow’s milk allergy also find that their body recognizes the same proteins in goat’s milk.
However, if you are sensitive but not allergic to cow’s milk, you will probably find products like feta to be a great alternative!
Another potential caution when consuming feta cheese is for those suffering from histamine intolerance. (8) Again, histamine is a vital protein in small doses to help your body fight infection, but too much of it causes excess inflammation. People who suffer from histamine intolerance, unlike most people, have a very hard time breaking down histamine when it exists in high levels in the body, and may experience allergy-like symptoms when consuming food containing the histamine protein.
If you experience symptoms like hives, sweating or swelling after consuming feta cheese or other goat/sheep milk products, stop eating it and consult your physician immediately.
The Truth About Cancer


12 Ways to Use Essential Oils For Healing & Health

In a hurry? Click here to read the Article Summary...

One of the things new users of essential oils ask most frequently is “What do I do with them? I just bought three new bottles and I have no idea how to use essential oils, other than take the caps off and sniff them.” If you fall into this category, this article will offer some great tips on how to use essential oils as part of your healing practice and general health improvement.

Phytochemicals: the Healing Compound in Essential Oils

It is interesting to learn that the very thing that gives an essential oil its characteristic smell is also what provides that oil with its healing ability. There can be hundreds of phytochemicals (plant based chemicals) within each drop of essential oil. Science is just beginning to learn exactly how each phytochemical works in the human body. Having said that, there is still much we do not know!
These phytochemicals have funny names like terpenes, aldehydes, esters, ketones, phenols, oxides, sesquiterpenes, and many more. Each one works differently in the body.
For instance, ketones (found in lavender essential oil, patchouli, hyssop) stimulate cell regeneration, liquefy mucous, and have calming properties.
Aldehydes (found in lemongrass essential oil, melissa, and citronella) tend to be highly anti-viral and anti-inflammatory.
Sesquiterpenes (found in cedarwood, sandalwood, and German chamomile, to name a few) are known for reversing inflammation. Sesquiterpenes are also one of the only substances that can cross the protective blood-brain barrier and increase oxygen to the brain. They can also reverse DNA damage and delete it from cellular memory. As a result, essential oils that contain sesquiterpenes could be quite beneficial for cancer patients.

Essential Oil Quality Varies

The phytochemical make-up of an oil can vary from plant to plant, even on the same farm. Growing conditions, harvesting methods, and even the time of day that the plant is harvested can have an effect on the phytochemical content of an oil. For instance, ylang ylang flowers are best collected between midnight and 9:00 am in the morning. That is when the essential oil content in the flowers is at its highest and best.
So why am I sharing all of this with you? Not only because it’s interesting, but also to underscore the need to ensure that your essential oils, particularly if you are using them for regaining your health, come from a reputable company.
Make sure the essential oils you purchase are organically grown. Be sure that the company knows how to properly distill each of the oils they sell, and that they do not use chemicals during the extraction process. A good essential oil company will also check each essential oil batch using gas chromatography to ensure that each batch has the proper phytochemical constituents. Don’t just rely on a label that says “pure.” These days, that just isn’t good enough.
Essential-Oils-health-benefits

12 Great Ways to Use Essential Oils

#1. Bottle Inhalation Method – Begin by holding the essential oil bottle about the level of your heart. Waft the bottle a little, moving it ever closer to your nose. Deeply breathe in the aroma, gently at first. If you like it and it seems appropriate, breathe more deeply. When you breathe in an essential oil through the nose, the tiny oil molecules (the vapor) contain all of the same properties that the oil contains. They interact with the olfactory organ and the brain. Oil molecules inhaled through nose or mouth also move into the lungs and interact with the lungs and respiratory system.
#2. Hand Inhalation Method – Drip a few drops of essential oil onto your palms, rub them together to activate the oil, and cup them over the mouth and nose. As with the Bottle Inhalation Method, breathe gently at first and then if it seems appropriate, breathe the oil in deeply − as if you were dragging the oil up over your brain. Be sure to leave your eyes out of this as essential oils do not belong anywhere near the eyes. (Warning: If you do happen to accidentally get an essential oil into your eyes, dilute immediately with a carrier oil like sweet almond or olive, never water. It will burn like crazy but will ease in a few minutes.)
#3. Terracotta Pendant Method – Put a drop of oil on a terracotta pendant, fasten it around your neck, and enjoy the benefits of that oil as you move through your day.
#4. Bedtime Salt Bowl Method – Place a small amount (about 1/4 cup) of sea salt flakes or Epsom salt in a small bowl. Drip 10-15 drops of your chosen essential oil onto the salt. Keep it by your bed. The salt helps to slow down the evaporation rate of the oils, allowing you a longer diffusion throughout the night. A great way to get some anti-cancer potential into you while you sleep.
#5. Steam Bowl Inhalation – Drip your chosen essential oil into a bowl of steaming water (please use filtered so that no chlorine is also inhaled). Place a towel over your head and over the bowl of water and breathe in deeply (be careful if the water was boiled, the steam can be hot enough to burn). Please keep your eyes closed when using this method or use swimming goggles to protect your eyes. The steam quickly vaporizes the oil and it is rapidly absorbed into the throat, sinuses, and then bloodstream. This method is a very direct and potent method. Do not use any more than 1-2 drops of essential oil, or you may find it overwhelming. Please note that heating oils can diminish the therapeutic value of the oil so do not use this method exclusively if you are fighting cancer.
#6. Ultrasonic Diffusing – An ultrasonic diffuser uses air, water, and ultrasonic vibrations to diffuse the oil into the air. A fine mist is created and released into the air, so it doubles as a humidifier. The concentration of essential oils is gentler since water is used. This method allows the oil molecules to remain air-bound for several hours and does not affect the structure or therapeutic value of the oil. You can use several oils together, for instance frankincense and sandalwood. Two or more oils are better than one, because the phytochemicals in each oil offer different healing properties.
#7. Car Diffuser – Many companies now make car diffusers for their essential oils. Imagine getting a great smelling anti-cancer treatment right in the safety of your car as you drive to work or while running errands! Don’t have a diffuser? Don’t worry − just get a cotton ball, drip a few drops of your chosen oil onto it, stick it in the air vent, turn on the vent and enjoy.
#8. Essential Oil Massage – There are a couple of ways to go about this. You can massage the essential oils into your body, neat, meaning without dilution. Be sure to have some guidance from your practitioner about which ones may require dilution. You can also dilute essential oils by adding a natural carrier oil (organic wherever possible) such as sweet almond or coconut oil, or even olive oil. Apply the diluted essential oils to skin areas with gentle massage strokes. As a guideline, you can make a 1% concentration, which equals one drop of essential oil to one teaspoon of carrier oil. A 2% dilution would be two drops of essential oil to one teaspoon of carrier oil. Be sure to consult a practitioner when using essential oils for children, as they require much weaker dilutions than do adults.
#9. The Foot Absorption Method – Massage a few drops of your chosen essential oils into the bottoms (the soles) of your feet before you go to bed. The soles of the feet contain some of the largest pores in the body. Therefore, the oils are easily absorbed and working in your bloodstream within just a few minutes.
#10. Oral Ingestion – Unless you are working under the guidance of a certified health practitioner, it is not suggested that you take an essential oil internally. It is not that taking oils internally is necessarily a bad or dangerous thing, but you do need some guidance as to which oils are safe to take internally, how much to use, and how frequently.
#11. Essential Oil Bath –  Drip your chosen essential oils into a warm (not hot) bath. Use a few tablespoons of a dispersant like full cream milk or coconut oil which will assist in the absorption of the oils through your skin. Then just step into the bath and soak. Not only are you absorbing the oils, but also directly inhaling them at the same time. This is also a great way to finish off those bottles of essential oils that just have a drop or two left in them − just drop the entire bottle into your bath.
#12. Instead of Perfume – Rather than using man-made (and potentially toxic) perfumes, combine your favorite essential oils and wear them on your pulse points, behind your ears, on your collarbone, and on both sides of your neck. Not only will you smell fabulous, you are bringing the phytochemicals in those oils right into your body.
As you can see, there are many ways to use essential oils. Don’t be afraid to try new methods. The important thing is to begin, and to use them every day… because they can’t help you improve your health if they stay in the bottle!

Article Summary

  • New users of essential oils often wonder what to do with them beyond taking off the caps and sniffing the oils.
  • There can be hundreds of phytochemicals (plant based chemicals) within each drop of essential oil. These phytochemicals have funny names like terpenes, aldehydes, esters, ketones, phenols, oxides, sesquiterpenes, and many more.
  • Each phytochemical has different properties and science is just beginning to understand how each phytochemical works in the human body.
  • The phytochemical make-up of an oil can vary from plant to plant. You need to ensure that your essential oils, particularly if you are using them for regaining your health, come from a reputable company. Don’t just rely on a label that says “pure.”
  • Here are 12 ways you can use essential oils (see the article for details on how to use each method):
    1. Bottle Inhalation Method
    2. Hand Inhalation Method
    3. Terracotta Pendant Method
    4. Bedtime Salt Bowl Method
    5. Steam Bowl Inhalation
    6. Ultrasonic Diffusing
    7. Car Diffuser
    8. Essential Oil Massage
    9. The Foot Absorption Method
    10. Oral Ingestion
    11. Essential Oil Bath
    12. Instead of Perfume

Dr Josh Axe


Salt Water Flush Recipe

Salt water flush recipe
Are you like 20 percent of the public that suffers from constipation? It’s nothing to be ashamed about, so even if high-fiber foods don’t always do the trick, consider a salt water flush. Sometimes called a “salt water cleanse” or a “master cleanse,” it’s designed to help you cleanse your colon and digestive system by bringing on a forced bowel movement.
The key part of a salt water flush recipe is salt itself, as it’s needed for many biochemical processes. The official salt water flush has become more popular over the past decade as a “hack” to facilitate digestion and cleansing as part of a kick-start when doing a “master cleanse” program. Drinking a salt mixture ignites the body’s own mechanism of natural detoxification and waste elimination, helping to get your digestive system back on track and in the process making you feel lighter, less sluggish and less weighed-down.
Feeling bloated or backed up? Try this natural salt water flush recipe!

The salt water flush is most effective if you perform it first thing in the morning on an empty stomach. If you do it later in the day, just make sure you haven’t eaten anything in the past one to two hours.
To perform a simple sea salt flush at home, start with 2 teaspoons of sea salt, which can be colored salt, such as pink Himalayan salt or “gray salt.” (Make sure it’s pure salt, for you don’t want to use iodinated salt — so always make sure there is no iodine added at all.)
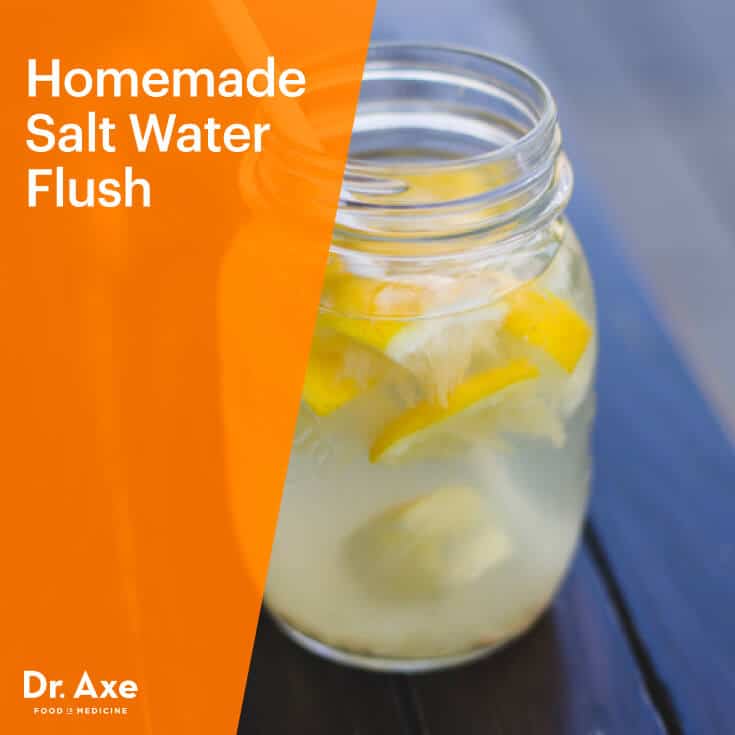
Heat up 1 liter of filtered water. You want the water to be warmer than room temperature, but not boiling or very hot. It should be cooler than the temp you would use to brew tea or coffee.
Grab a glass jar with a lid and add the salt, hot water, and some fresh lemon juice or lemon water (which helps cut the taste of the salt). Shake it vigorously to fully dissolve the salt. Make sure no granules are visible, which will settle at the bottom of your jar/lid if they’re still undissolved.
Drink the mixture quickly, within a few minutes if possible (under 5 minutes is the goal). Since it doesn’t taste great (it’s very salty!), you will probably want to drink it down as fast as you can.
Lay down on your side and massage your belly on one side, then repeat on the other side. If you can manage to hold in the solution for about 30 minutes, this will help your body fully absorb the salt.
Within a short time after finishing the mixture, you should start to feel the urge to go to the bathroom. Once you feel you can no longer hold out, go to the bathroom. You might have to go more than one time, sometimes needing to use the bathroom for several hours before you’re fully “cleansed” and your colon is emptied.
After doing a cleanse of any kind, it’s a good idea to take a probiotic supplement and load up on healthy foods, which helps establish healthy bacteria in your internal gut flora (microbiome) and provide you essential nutrients/electrolytes.